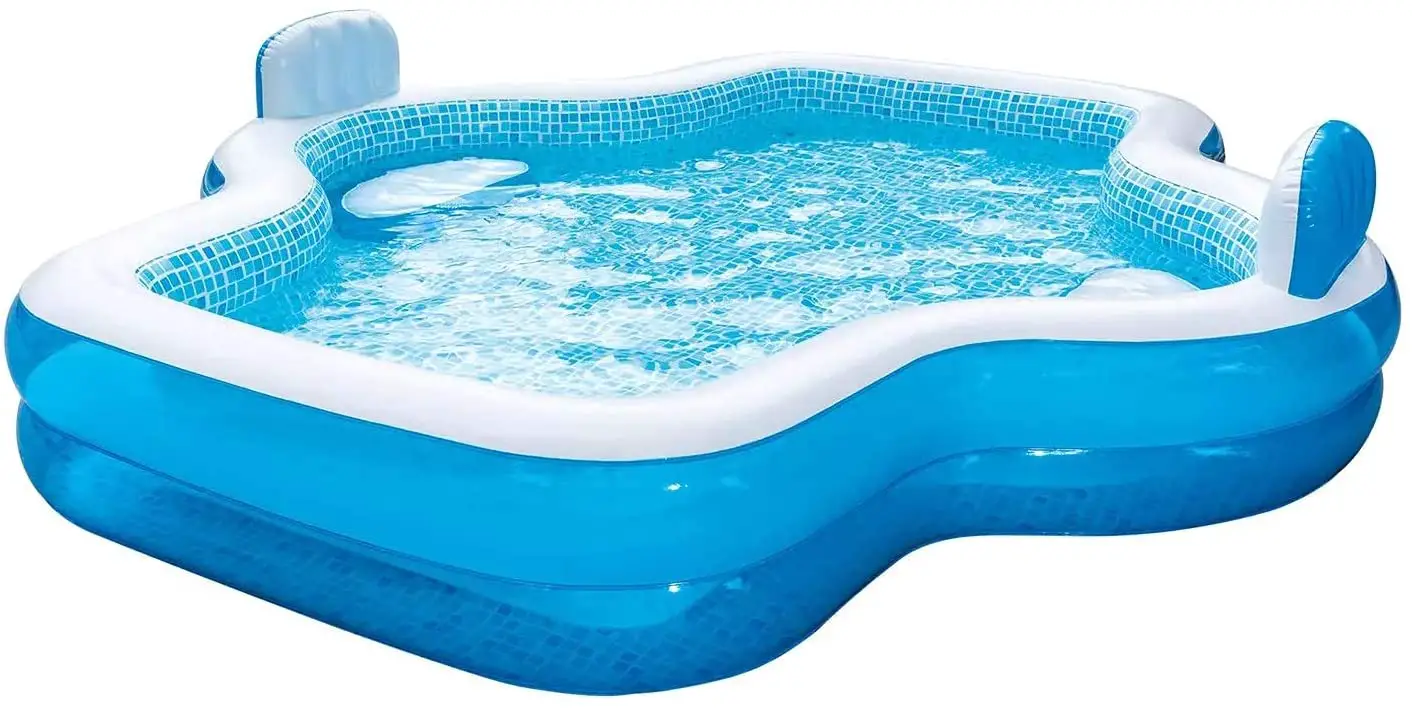
Discovering a leak in your inflatable pool can be a dampener on your sunny day plans. It’s a common issue many pool owners face, especially after regular use and exposure to the elements. But don’t let a small puncture deflate your spirits! Addressing a leak promptly and effectively is not just about salvaging a day of fun; it’s about safeguarding your investment and extending the life of your pool.
In this guide, we’ll walk you through the steps to patch your inflatable pool, turning a potentially frustrating problem into a manageable DIY project. With the right approach and a bit of patience, you can restore your pool to its former glory and get back to enjoying those cool, refreshing dips. Let’s get straight to the inflatable pool repair and ensure your pool remains the centerpiece of summer fun and relaxation.
Identifying the Leak
Before you can patch up your inflatable pool, the first step is to play detective and locate the elusive leak. Finding the exact spot of the leak is crucial for a successful repair. Here are some effective methods to pinpoint where your pool is losing air:
- The Listening Technique: Sometimes, the simplest methods are the most effective. Inflate your pool to its normal level and listen closely. Move around the pool, bending down closer to the surface. A hissing sound is a clear giveaway of escaping air. Pay special attention to areas where leaks are more common, such as seams or near the inflation valve.
- The Soapy Water Method: If the listening technique doesn’t reveal the leak, it’s time to use soapy water. Mix a solution of dish soap and water, and apply it generously over the pool’s surface, especially around seams, valves, and any patches from previous repairs. Watch for bubbles that form and grow – these are indicators of escaping air. The larger the bubbles, the bigger the leak.
- Checking Common Leak Areas:
- Seams: These are often the first places to give way. Carefully inspect the seams by running your soapy water solution along them.
- Valves: Sometimes, the leak may be around the inflation valve. Make sure the valve is closed tightly. If you suspect a leak around the valve, apply soapy water here as well.
- Previous Patches: If your pool has been repaired before, check around old patches. They can sometimes lose their seal over time.
- Using a Cloth: Another method is to run a dry cloth over the surface of the inflated pool. In some cases, the escaping air will create a noticeable vibration against the cloth, helping you pinpoint the leak’s location.
- Submersion Test (for smaller pools): If you have a small inflatable pool, you can inflate it and submerge sections of it in water (like a bathtub). Bubbles will escape from the source of the leak.
Remember, patience is key in this process. Take your time and be thorough. Once you’ve found the leak, mark it with a piece of tape or a waterproof marker – this will be your target for the patching process. With the leak identified, you’re well on your way to restoring your inflatable pool to its full glory!
Materials Needed
To ensure a successful patching process for your inflatable pool, having the right materials on hand is crucial. Here’s a comprehensive list of what you’ll need:
- Patch Kit: Most importantly, a patch kit designed for inflatable pools. These kits usually include vinyl patches and a suitable adhesive. Make sure the kit is appropriate for the material of your pool.
- Adhesive: If your patch kit doesn’t come with adhesive, you’ll need a strong, waterproof adhesive that’s compatible with vinyl or your pool’s material.
- Dry Towel: For drying the area around the leak before applying the patch. It’s important that the area is completely dry to ensure the patch adheres properly.
- Marker: A waterproof marker can be handy for marking the area around the leak, so you know exactly where to apply the patch.
- Scissors: To cut the patch to size. It’s recommended to cut the patch larger than the leak area and round the corners to prevent peeling.
- Rubbing Alcohol or Cleaning Solution: This is for cleaning the area around the leak before patching. It ensures the surface is free of dirt and grease, which can interfere with the adhesive.
- Gloves: To protect your hands from the adhesive, especially if you have sensitive skin.
- Flat Tool: Such as a credit card or a small roller, to smooth out the patch and ensure there are no air bubbles and that it’s evenly adhered.
- Pressure Gauge (optional): If you plan to reinflate the pool after patching, a pressure gauge will help you inflate it to the correct pressure, avoiding over-inflation.
Gathering these materials before you start will make the patching process smoother and more efficient. With everything at your disposal, you’ll be well-equipped to tackle the repair and get your inflatable pool back in shape for more fun in the sun.
Step-by-Step Guide to Patching an Inflatable Pool
Patching your inflatable pool is a straightforward process, but it requires precision and patience. Here’s a step-by-step guide to ensure a successful repair:
- Draining and Drying the Pool Area Around the Leak
- Before starting the repair, deflate the pool and drain it completely. It’s important to work on a flat, dry surface.
- Once drained, thoroughly dry the area around the leak. Any moisture can hinder the adhesive’s ability to bond properly. Use a dry towel to ensure the area is completely free of water.
- Cutting the Patch to Size
- Cut a patch from your repair kit that is slightly larger than the leak. It should extend at least an inch around the hole or tear for a secure fix.
- Round the corners of the patch. Sharp corners can peel off more easily over time.
- Applying the Adhesive
- Apply a thin layer of the adhesive provided in your patch kit to both the patch and the area around the leak. Be sure to follow the manufacturer’s instructions regarding adhesive application.
- Allow the adhesive to become tacky if required by the instructions. Some adhesives need a few minutes to set before applying the patch.
- Placing the Patch
- Carefully place the patch over the leak, making sure it’s centered and covers the area completely.
- Press it down firmly, starting from the center and working your way outwards. This helps to remove any air bubbles and ensures a good seal.
- Ensuring a Good Seal
- Apply pressure to the patch for a few minutes. You can use a flat object like a book to maintain even pressure.
- Check the edges of the patch to ensure they are completely adhered to the pool surface.
- Waiting Time
- Allow the patch to cure for the recommended time specified in your patch kit instructions. This is crucial for a strong bond. The waiting time can vary, but it’s usually at least 12-24 hours.
- Do not inflate or refill the pool until the patch has completely cured.
Preventive Measures and Maintenance Tips
To keep your inflatable pool in top condition and minimize the likelihood of future leaks, it’s essential to adopt some preventive measures and regular maintenance practices. Here are some tips to help you keep your pool leak-free and extend its lifespan:
- Proper Inflation: Over-inflation can strain the seams and material of your pool, making it more susceptible to leaks. Always inflate your pool according to the manufacturer’s instructions. Use a pressure gauge if possible to ensure the correct level of inflation.
- Avoid Sharp Objects: This might seem obvious, but it’s worth emphasizing. Keep sharp objects like toys, tools, or garden equipment away from the pool. Even small punctures can turn into bigger leaks over time.
- Use a Ground Cloth: Placing a ground cloth or tarp under your inflatable pool can prevent punctures or abrasions from rough surfaces. This simple step can significantly reduce the risk of leaks.
- Regular Inspection: Periodically check your pool for signs of wear and tear, especially in high-stress areas like seams and around the inflation valve. Early detection of potential problems can prevent them from turning into bigger issues.
- Proper Storage: When not in use, especially during off-season months, store your pool properly. Fully deflate it, clean it thoroughly, dry it completely, and store it in a cool, dry place away from direct sunlight. Sun exposure and extreme temperatures can degrade the material over time.
- Avoid Chemical Overuse: If you use chemicals in your pool, follow the recommended amounts. Overuse of chemicals like chlorine can weaken the pool material, making it more prone to leaks.
- Routine Cleaning: Regularly clean your pool to prevent the buildup of algae and debris, which can cause damage over time. Use soft cleaning tools to avoid scratching or damaging the pool surface.
- Monitor Water Levels: Keep an eye on water levels. A sudden drop might indicate a leak, allowing for quick action before the problem worsens.
- Educate Pool Users: Make sure everyone who uses the pool understands the importance of treating it gently. Avoid jumping into the pool or using it as a trampoline, as these actions can stress the material and seams.
By implementing these preventive measures and maintenance tips, you can significantly reduce the risk of leaks and ensure that your inflatable pool remains a source of fun and relaxation for many seasons to come. Remember, a little care goes a long way in extending the life of your inflatable pool.
Conclusion
In conclusion, properly patching your inflatable pool is more than just a quick fix; it’s an essential part of extending its lifespan and ensuring many more seasons of enjoyment. By following the detailed steps outlined in this guide, from identifying and preparing the leak area to applying the patch meticulously, you can effectively restore your pool’s integrity. Remember, the key to a successful patch job lies in patience and precision.
Furthermore, the adoption of preventive measures and regular maintenance routines can’t be overstressed. These practices not only help in avoiding future leaks but also play a crucial role in preserving the overall condition of your pool. Proper inflation, routine inspections, and careful handling are simple yet effective strategies to keep your inflatable pool in prime shape.
We hope this guide has been helpful in navigating the repair process. But we also know that every pool and situation is unique. So, we’d love to hear from you! If you have any additional tips, experiences, or stories about patching your inflatable pool, please share them in the comments section below. Your insights could be immensely helpful to fellow pool owners facing similar challenges.
Together, let’s make this summer and many more to come full of endless, leak-free fun in our inflatable pools! Keep splashing and enjoying those sunny days.


